When it comes to maintaining a clean and hygienic home, few things are as essential as the bathroom deep cleaning. A haven for moisture, germs, and grime, bathrooms require regular deep cleaning to ensure optimal cleanliness and freshness. In this comprehensive guide, we’ll walk you through the essential steps for achieving a sparkling clean bathroom that not only looks immaculate but also promotes a healthy living environment. From gathering supplies to addressing every nook and cranny, we’ll cover everything you need to know to transform your bathroom into a pristine sanctuary of cleanliness.

Step 1: Gather Supplies

Before embarking on your bathroom deep cleaning journey, it’s essential to gather all the necessary supplies and tools. Having everything on hand will streamline the cleaning process and ensure you have everything you need to tackle every surface and fixture.

Here’s a checklist of essential supplies to gather before you begin your deep cleaning your bathroom:
  1. All-purpose cleaner or bathroom-specific cleaning solution
  2. Disinfectant spray or wipes
  3. Microfiber cloths or cleaning rags
  4. Scrub brushes or sponges for tough stains
  5. Toilet bowl cleaner and brush
  6. Glass cleaner for mirrors and glass surfaces
  7. Grout cleaner for tile and grout surfaces
  8. Rubber gloves to protect your hands
  9. Old toothbrush for detailed cleaning
  10. Broom, dustpan, and mop for floor cleaning

Once you have all your supplies assembled, you’ll be ready to tackle each step of the bathroom deep cleaning process with ease and efficiency. So grab your cleaning arsenal and let’s get started on the path to a sparkling clean bathroom!

Step 2: Clear and Declutter

Before diving into the deep cleaning process, it’s crucial to clear out any clutter and remove items from surfaces and storage areas in the bathroom. Clearing the space not only makes it easier to access all areas for cleaning but also allows you to thoroughly clean and disinfect every surface. Begin by removing any items from countertops, shelves, and cabinets, and placing them in a designated area outside the bathroom.

Once the space is cleared, take the opportunity to declutter and assess which items are essential and which can be discarded or relocated. Dispose of any expired products, empty containers, or items that you no longer use. Consider organizing remaining items in bins or baskets to keep the space tidy and make future cleaning easier.

Pro Tip: Check out our blog post How To Organize Your Home Before Deep Cleaning to help make bathroom deep cleaning a breeze!

Step 3: Pre-Treat Surfaces and Fixtures

Before tackling the deep cleaning tasks, it’s beneficial to pre-treat surfaces and fixtures to loosen dirt, grime, and soap scum buildup. Pre-treating allows cleaning solutions to penetrate and dissolve stubborn stains, making them easier to remove during the cleaning process.

Start by spraying all surfaces, including countertops, sinks, showers, and tubs, with an appropriate cleaning solution or pre-treatment spray. Pay particular attention to areas prone to buildup, such as around faucets, showerheads, and grout lines. Allow the cleaning solution to sit for several minutes to effectively loosen dirt and grime while you move on to other tasks.

While surfaces are pre-treating, take the opportunity to remove and clean removable fixtures and accessories, such as showerheads, faucet aerators, and soap dishes. Soak these items in a solution of warm water and vinegar or a mild cleaning solution to dissolve buildup and disinfect thoroughly. Once soaked, rinse and dry these items before reattaching them to their respective fixtures.

By pre-treating surfaces and fixtures, you’ll ensure a more thorough and effective deep cleaning process, resulting in a bathroom that sparkles from top to bottom. Now that surfaces are prepped and clutter is cleared, it’s time to dive into the heart of the deep cleaning process and tackle each area of the bathroom with precision and care.

Step 4: Scrub and Disinfect Surfaces

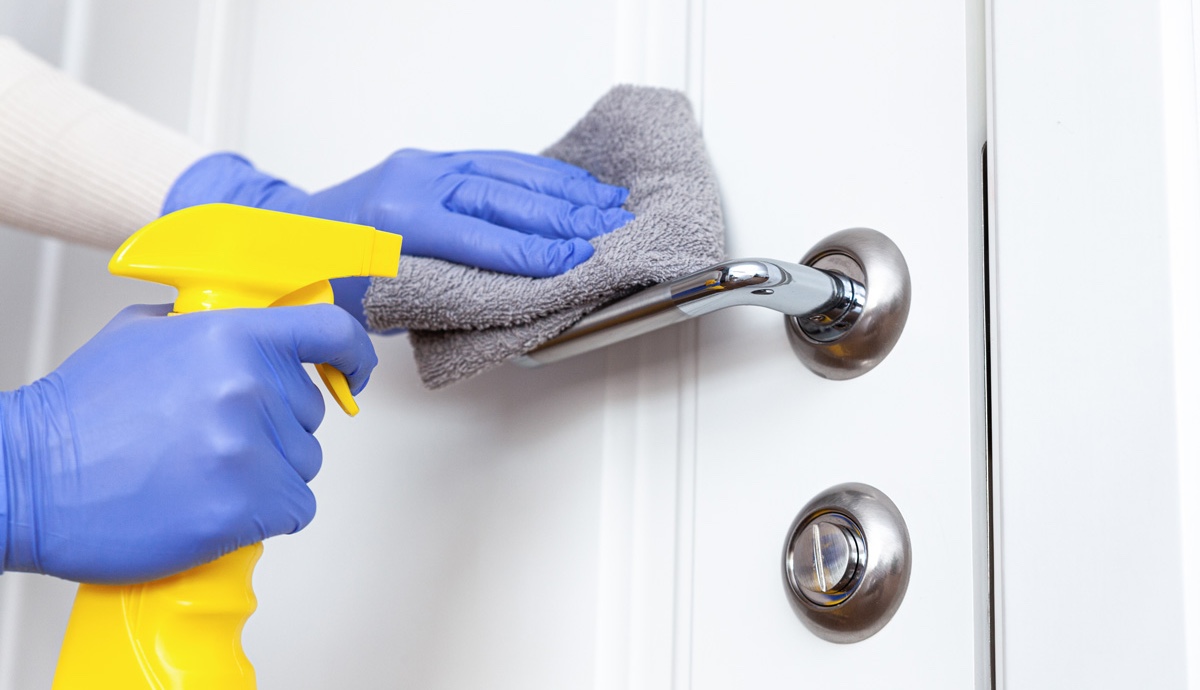
With surfaces pre-treated and fixtures removed, it’s time to roll up your sleeves and start scrubbing. Begin by focusing on high-touch areas such as countertops, sinks, and toilet handles. Use a clean microfiber cloth or sponge to scrub surfaces thoroughly, paying close attention to areas where dirt, grime, and soap scum tend to accumulate.

For stubborn stains and buildup, use an appropriate cleaning solution or bathroom cleaner and a scrub brush to tackle tough spots. Work in small sections, applying the cleaner and allowing it to sit for a few minutes before scrubbing vigorously. Rinse surfaces thoroughly with water to remove any residue and wipe dry with a clean towel or cloth.

Once countertops, sinks, and fixtures are cleaned, move on to shower walls, tubs, and tile surfaces. Use a combination of a scrub brush and cleaning solution to remove soap scum, mildew, and hard water deposits. Pay special attention to grout lines, where dirt and grime can accumulate over time. For tiled surfaces, consider using a grout brush or toothbrush to scrub grout lines and remove embedded dirt and stains.

After scrubbing surfaces, it’s essential to disinfect to kill any remaining germs and bacteria. Use a disinfectant cleaner or a mixture of bleach and water to disinfect high-touch surfaces thoroughly. Follow the manufacturer’s instructions for proper dilution and application, and allow the disinfectant to sit for the recommended contact time before rinsing or wiping dry.

Step 5: Clean and Polish Fixtures

With surfaces scrubbed and disinfected, it’s time to turn your attention to fixtures and hardware in the bathroom. Start by cleaning and polishing faucets, showerheads, and other metal fixtures to remove water spots and restore shine.

Use a mild cleaning solution or vinegar and water mixture to clean metal fixtures, applying it with a soft cloth or sponge. Gently scrub the surface to remove any residue or buildup, focusing on areas where water tends to collect, such as around faucet handles and showerheads. Rinse thoroughly with water and buff dry with a clean towel to prevent water spots and streaks.

For chrome or stainless steel fixtures, consider using a metal polish or stainless steel cleaner to restore shine and remove stubborn water spots. Apply the polish according to the manufacturer’s instructions, using a soft cloth to buff the surface to a high shine. Repeat as necessary until fixtures are clean and sparkling.

By cleaning and polishing fixtures, you’ll not only enhance the appearance of your bathroom but also extend the life of your fixtures and hardware. With surfaces scrubbed, disinfected, and fixtures cleaned and polished, your bathroom will be well on its way to a sparkling clean finish.

Pro Tip: For optimal results when cleaning and polishing fixtures, consider using specialized metal polishing products designed specifically for chrome or stainless steel surfaces. These products are formulated to remove stubborn water spots, tarnish, and oxidation, leaving fixtures clean, shiny, and like new.

Step 6: Tackle the Floors:

  • Start by sweeping or vacuuming the bathroom floor to remove loose dirt, hair, and debris. Pay close attention to corners and baseboards where dust and dirt tend to accumulate.
  • Once the floor is free of loose debris, mop the floor using a suitable cleaner or a mixture of warm water and mild detergent. Use a mop with a microfiber or sponge head to effectively clean and sanitize the floor surface.
  • For tile or grout floors, consider using a grout brush or scrub brush to tackle stubborn stains and buildup. Apply the cleaner directly to problem areas and scrub vigorously to remove dirt and grime.
  • Rinse the floor thoroughly with clean water to remove any remaining cleaner and dirt residue. Use a clean towel or mop to dry the floor surface, paying special attention to grout lines and areas around the toilet base.
Pro Tip: Consider using a steam cleaner for tile or grout floors to deep clean and sanitize without the need for harsh chemicals. Steam cleaners use high-temperature steam to loosen dirt and grime, making it easier to remove tough stains and bacteria.
Step 7: Address the Details:

With the major cleaning tasks complete, take the time to address any remaining details and finishing touches to ensure your bathroom is sparkling clean from top to bottom.

  • Wipe down light fixtures, switch plates, and vent covers with a damp cloth to remove dust and dirt buildup. Use a gentle cleaning solution or multipurpose cleaner to disinfect and polish these surfaces as needed.
  • Clean and disinfect any decorative items or accessories in the bathroom, such as soap dispensers, toothbrush holders, and decorative accents. Use a mild cleaning solution or disinfectant spray to sanitize these items and remove any lingering germs or bacteria.
  • Finally, take a moment to inspect the bathroom for any overlooked areas or spots that may require additional attention. Touch up any missed spots or stains and ensure that all surfaces are clean, dry, and free of debris.

By tackling the floors and addressing the details, you’ll put the finishing touches on your bathroom deep cleaning routine and ensure that every surface shines. With the floors clean and the details addressed, your bathroom will be transformed into a pristine oasis of cleanliness and comfort.

Step 9: Put the Finishing Touches

With all surfaces cleaned, disinfected, and refreshed, it’s time to put the finishing touches on your bathroom deep cleaning. Take a few moments to inspect the bathroom for any missed spots or areas that may need additional attention. Touch up any remaining stains or spots with the appropriate cleaning solution or spot treatment.

Once you’re satisfied with the cleanliness of the space, take the opportunity to reassemble and arrange items in the bathroom. Return cleaned and decluttered items to their designated places, and consider adding decorative touches such as fresh flowers or scented candles to enhance the ambiance of the space.

Finally, step back and admire your hard work! Your bathroom is now sparkling clean, fresh, and ready to enjoy. By following these essential steps for deep cleaning your bathroom, you’ll not only maintain a pristine living environment but also create a sanctuary of cleanliness and relaxation for you and your family to enjoy.

Pro Tip: Consider scheduling routine cleaning services with Mill City Cleaning to keep your bathroom looking its best year-round. Our experienced team specializes in bathroom deep cleaning and proper tile care, ensuring that your bathroom remains clean, hygienic, and inviting with each visit.

Step 10: Establish a Regular Cleaning Routine

Now that your bathroom is sparkling clean, it’s essential to establish a regular cleaning routine to maintain its pristine condition. Consistent upkeep will help prevent the buildup of dirt, grime, and mold, ensuring that your bathroom remains fresh and inviting between deep cleanings.

Create a weekly cleaning schedule that includes tasks such as wiping down surfaces, disinfecting high-touch areas, and cleaning mirrors and fixtures. Invest in quality cleaning products and tools to make the job easier and more efficient, and be sure to follow manufacturer instructions for proper use and safety.

In addition to weekly cleaning, consider incorporating daily maintenance tasks into your routine to keep your bathroom looking its best. Simple habits such as wiping down countertops after use, hanging up wet towels to dry, and ventilating the space to reduce humidity can make a big difference in maintaining cleanliness and preventing mold and mildew growth.

By establishing a regular cleaning routine and sticking to it, you’ll ensure that your bathroom remains a clean, hygienic, and welcoming space for you and your family to enjoy. And remember, if you ever need extra help or want to give your bathroom a deep clean, you can always rely on Mill City Cleaning for expert cleaning services tailored to your needs. Contact us today for a free home cleaning quote!


By Published On: February 27th, 2024Categories: Uncategorized0 Comments